


The Slice On Pet Nail Trims
When it comes right down to it, the thought of trimming your own pet’s nails has most pet owners running for the hills. In this month’s pet blog, our pet care experts at Your Pet Care Connection talk about how to approach in-home grooming care for your beloved pet. So grab a pair of pet nail clippers, and sit down Moore County pet parents, we’ve got this!
Why Should You Trim Your Pet’s Nails?
While the answer to this question might seem fairly transparent, sometimes this simple grooming task gets overlooked.
Many small animal, and feline, pet parents don’t realize that trimming their pet’s nails is just as important as it is for dogs. While cats should have cat scratchers readily available to them, they still need regular trims to help keep their nails from overgrowing. Just like a dog that regularly gets exercise out on the pavement, helping keep their nails down, cat scratchers are also a “helper” but not equivalent to a trim itself.
Regardless of what kind of pet you have, keeping your pet’s nails properly maintained helps to:
- Maintain a healthy nail & nail bed
- Prevent any overgrown / curling nails
- Keep you pet comfortable when walking
- Keep your pet comfortable, and relaxed, with their routine grooming
Think about how you feel, physically, if you allow your toenails to grow out too far. Just like with us, allowing your pet’s nails to grow out too far can be painful for them. Overgrown nails put stress on your pets paw-pads, as their weight shifts to accommodate the new length associated with their paw. Grossly overgrown nails often curl inwards, making it difficult for the pet to walk properly.
Maintaining proper nail length helps to keep your pet’s nail bed (aka the “quick”) from growing out, allowing for a shorter overall nail.
When Should You Start Trimming Your Pet’s Nails?
One common question pet parents have is “When should I start trimming my puppy’s/kitten’s nails?” Well Moore county pet parents, we’re so glad you asked!
While an old dog can in fact learn new tricks, the fact remains that it’s significantly easier the younger your pet is. Just like with tricks, your new pet has to learn about their essential grooming care. Teaching them early on, typically anytime after 6 weeks of age, about how to sit still and allow their paws to be touched or played with will serve both you and your pet well for years to come.
Start small. The first few times you might simply play with your pet’s paws, to get them used to having their feet touched. Next you might get to know the trimmers, by allowing them to sniff them, and then running the clippers gently over their feet while pretending to clip. Finally, you can start by clipping a toe or two at a time. Remember, this is not a race. It’s a useful new skill, you’ll use for the entire lifetime of your pet!
How Frequently Should You Trim Your Pet’s Nails?
Another commonly asked question pet parents have is how frequently their pet’s nails should be trimmed. The easy answer to this question? Your pet’s nails most commonly need trimming monthly.
However, this can also vary from pet to pet. But why does it vary? Here are some things to consider, when deciding how often to trim your pet’s nails.
- Each pet’s nails grow at a different rate
- Infrequent nail trimmings can cause your pet’s nail bed to lengthen
- Frequent nail trimmings keeps your pet’s nail bed in check, allowing for overall shorter nails
- Your pet’s activity level may influence how often you need to trim their nails
- You pet’s diet can influence their nail health & growth rate
- Your pet’s nail health may help indicate your pet’s overall health, making it import to routinely check
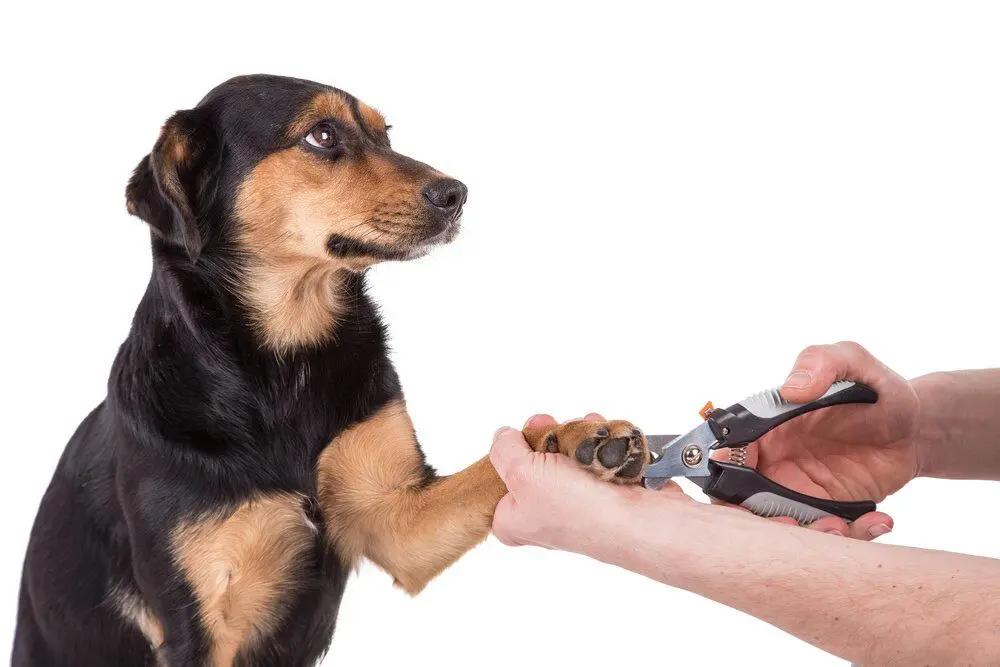
Your Grooming Tool Belt: What You’ll Need To Trim Your Pet’s Nails At Home
As with any other grooming care, there are certain supplies you’ll need to collect in order to trim your pet’s nails.
- Appropriately Sized Trimmers: Make sure you select an appropriately sized pair of trimmers, to reduce the risk of injury to your pet. A pair that’s overly large may be harder to see around, to find your pet’s quick, while a pair that’s too small may not have the cutting power needed to make it through your pet’s nailbed.
- Styptic Powder: It’s always a good idea to have Quickstop, or another brand of styptic powder, on hand in case of any bleeding. Whether you’re a DIY pet parent, or a grooming professional, accidents can happen from time to time. Be sure that you’re prepared, with something to stop the bleeding, just in case.
- Blanket/Towel (As-Needed): For smaller pets, a blanket or towel can be a helpful tool to help safely restrain your pet.
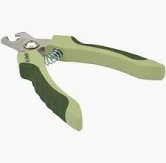
Note: Your Pet Care Connection LLC both uses and recommends an “open face” kind of nail trimmer, as displayed above. We feel that this is a safer, easier way than the once popular full circle/guillotine trimmers. While we receive NO endorsements, a link to our recommendation is provided, above.
The Big Slice: Knowing Where To Trim
Okay, so we’ve addressed why, how often, when, and what you’ll need to trim your pet’s nails. So, how about the how-to though? How do you actually trim a pet’s nails?
Picking where to trim can get kind’a tricky. But don’t worry, we’re here to help guide you through it. Check out these helpful diagrams, and our quick step-by-step guide, below.
Important Health Note: Pets whose nails are overgrown cannot be cut short as the quick gradually grows out with the nail. In order to shorten the overall length of the pet’s nails, regular nail trims are required in order to assist the nail bed in receding, resulting in a shorter nail. While this problem is correctable, this process may take multiple months in order to see a visible difference. You’ll need to allow time for your pet’s nails to show improvement, after several months of regular weekly trims.
What The Quack Is “Quicking”?
We’re glad you asked ;). “Quicking” is when you trim too far into your pet’s nail bed, through the “quick”, causing their nail to bleed. Accidents happen. When trimming your pet’s nails by yourself at home, quicking your pet’s nail bed is something you’ll want to be prepared for. Follow the following steps after a quick (trim of the nail bed) occurs:
- For accidental trims of the nail bed, use a styptic powder topically to the affected area to stop the bleeding. Verify bleeding has fully stopped before continuing the trim.
- Assess whether or not the pet is ready to move on with the trim, or if you need to reconvene to try another time. If at all possible to continue the trim, do. This will help leave a more positive association with the task, by finishing on a better note, for an easier start next time.
- Monitor your pet as you continue to trim, checking back on the nail as needed and once the nail trim is completed.
- Anytime a pet is accidentally quicked, you’ll need to monitor to ensure that further follow-up with your veterinarian isn’t needed. Best rule of thumb is to call your veterinarian if you have questions.
A, Quick, Step-By-Step Guide To Pet Nail Trims
Okay, so let’s give you the quick rundown on how this whole “nail trimming” thing actually works. Then, check below for some important health notes and a few more details.
1. Pick A Place: position yourself and the pet in an area with hard (non-carpeted) floors for ease of cleanup.
2. Secure Your Pet: leash the pet (canine), or form a pet taco or purr-ito with a towel as needed for kitties or small animals. Step on leash to ensure that the animal stays with you during the trim.
3. Begin To Trim: trim each nail, including dew-claws, according to the diagram above, and inspect each for appropriate length and any possible quicking (cutting of the nail bed resulting in a pooling of blood) as you go along.
4. Keep It Positive: always be sure to keep things rewarding, and positive, for the pet. Reward the pet with praise as you go along, and offer any available treats at the end of the pet’s trim so as to positively reinforce their grooming experience.
Helpful Hint: Clean up your work site, and sweep up any nail trimmings left on the floor (those things are like Legos).
Task Details: Safely Securing Your Fur-Baby
Not every pet is overly..let’s say “enthusiastic” about getting their nails trimmed. That’s why making each and every grooming experience for your pet a positive one is so important. Part of your job, as the person providing the nail trim, is to ensure that your pet is safely secured to prevent injury.
For larger pets, such as pets 40 lbs+, this could be as simple as leashing up to a collar or harness. For smaller pets, such as guinea pigs, cats, and small dogs, you can utilize what we lovingly call the “burrito technique”. This luculent technique involves wrapping up your fur-baby, burrito style, in a blanket or towel to prevent undue stress or potential scratches.
Check out this helpful how-to video, on pet swaddling, below:
Regardless of what size your pet is, it’s advised to do so inside, within an area where you can shut the doors. You can also do some test runs, on other days, to help get your pet used to being in the enclosed space before you perform the actual nail trim.
Important Health & Safety Notes: Safe Body Positioning
Pet body positioning is important to ensure that no twists, or hyper extensions of limbs, are made that could result in soreness or lameness. For elderly pets, or pets with known medical conditions, special attention must be given to body positioning while performing the nail trim.
Important Health & Safety Notes: Success, Without The Stress
When trimming your pet’s nails, on a leash or in a purr-ito, it can easily take the “flight” option out of “fight or flight”. Always watch for signs of stress, or fear, that could lead to fear induced aggression. If your pet is overly agitated, take a break from the trim and resume again once your pet is calm. There’s no shame in waiting until a different day to finish things up, but plenty to lose if you push things too far.
Work to create a safe & positive experience for your pet, through verbal praise and conscientious physical touch. Always pay attention to your pet’s body posture and positioning, as they try to communicate with you about how they’re feeling. Keep things positive, and use verbal encouragement, and treats, whenever possible.
When YPCC’s pet care specialists come by for one of our in-home pet nail trims, we always take thing one step at a time. Have a pet that’s not quite ready for a trim, but want to work them up to it? Our pet care specialists are available for a fun and interactive “+paw-play” visit, to help get your pet used to receiving their essential grooming care. Your Pet Care Connection uses only positive reinforcement methods, to help work towards successful future nail trims, and reduce any stress or anxiety your pet may have towards grooming.
So what do you think, are you ready to trim your pet’s nails? If not, no worries, Your Pet Care Connection LLC has you covered. Sign up for Moore County NC in-home pet care services, today. We’ll be there to help, as soon as you can say “let’s shake on it”!